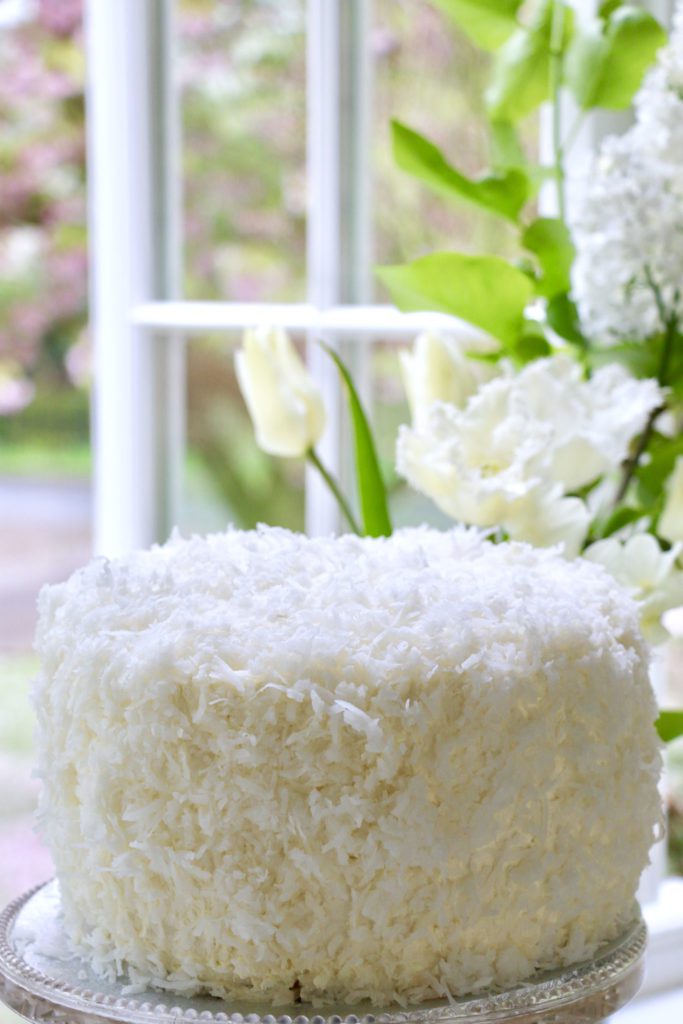
 It’s April, the cherry blossom and lilac are in glorious bloom, and it’s Easter week. In our house this means it’s time to make fresh coconut cake, which for idiosyncratic reasons I always associate with this time of year. There’s something about that white cloud of sweet coconut that seems so right at blossom time, and coconut also evokes memories of the Easter nest confections that delighted me as a child.
Then there is the fact that my sister Amy celebrates her birthday this month, and she was born in a small town with one other claim to fame in our funny family: this little place was home to a woman who made fresh coconut cakes to order, from scratch in her own kitchen. We would meet her for the much-anticipated handover on her old-fashioned porch, and I remember two things about those occasions as well as the cake itself: my father’s raptures on taking custody, and the old lady’s beaming smile — an exchange that must have helped instil in me the idea that baking equals happiness for both the giver and receiver.
Fresh coconuts are very good right now, so even if you have no such perambulating associations with this retro-glorious cake, its taste and showiness make it worth the trouble and calories. It is not a cake for everyday. It is for marking an occasion, something really special, or for when you need to make a difficult time feel better. Whatever the prompt, the result is bound to inspire bliss, in the moment and in memory: “Ooooh, remember that coconut cake we made with real coconut?” I know one fan who says this cake is like a fluffy white pillow she wants to bury her face in. Well, I can understand that. Dive right in.
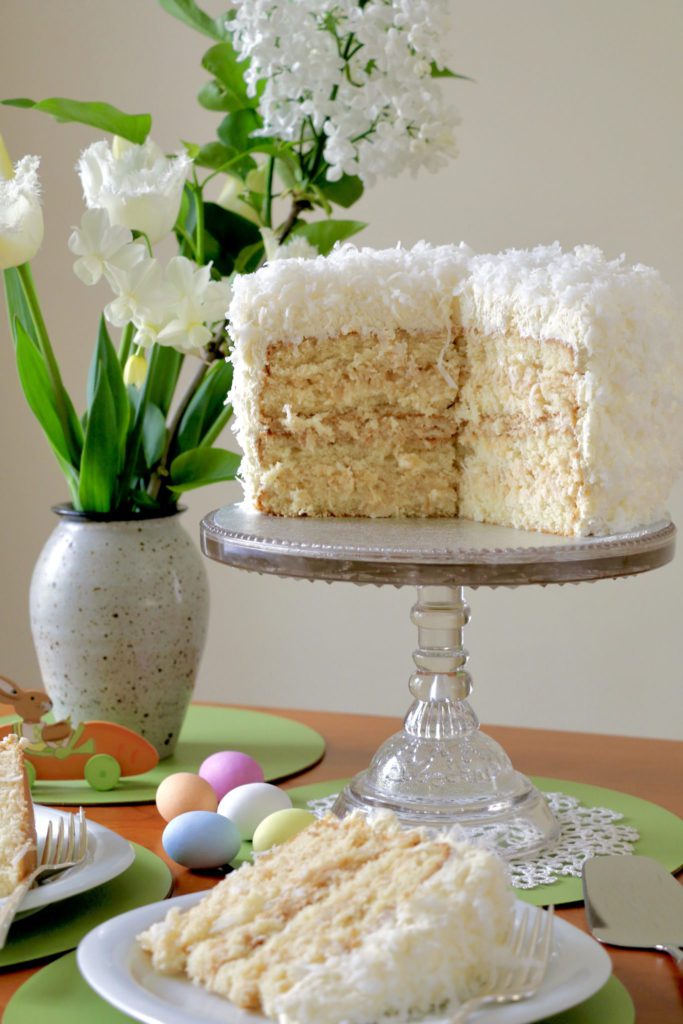 This interpretation of the old-fashioned classic is a beautifully light, three-layer yellow cake, filled with a delicious pastry cream into which is folded a generous amount of toasted coconut. Then onto the cake goes a coat of whipped cream, and more fresh coconut, untoasted this time for a contrast of flavour, colour and texture.
In cookbooks from the 60s and 70s, you’ll typically find the frosting for coconut cake to be a sweet ‘seven-minute’ meringue-like cooked frosting, and the filling is either more of the same or a tart lemon filling. These were good too, I recall, but I see no reason why the best part of coconut cream pie shouldn’t also fill a coconut cake, so I’ve evolved this custard and cream version, which I think allows the coconut to shine through.
Using a fresh coconut makes for an exceptional flavour, worth the effort involved in cracking it open with a hammer, peeling off the dark inner skin, and grating it. This can be a rewarding ritual if you can allow the time — it’s satisfying to process a beautiful raw ingredient yourself — and it can make a fun activity for kids to help with. If you don’t want to use fresh coconut, American cooks can use the sweetened coconut you buy in bags in the baking section of the supermarket, which can also be toasted for the filling. This commercially prepared baker’s coconut adds more sweetness to the whipped cream icing, which works nicely for those who like things a little sweeter.
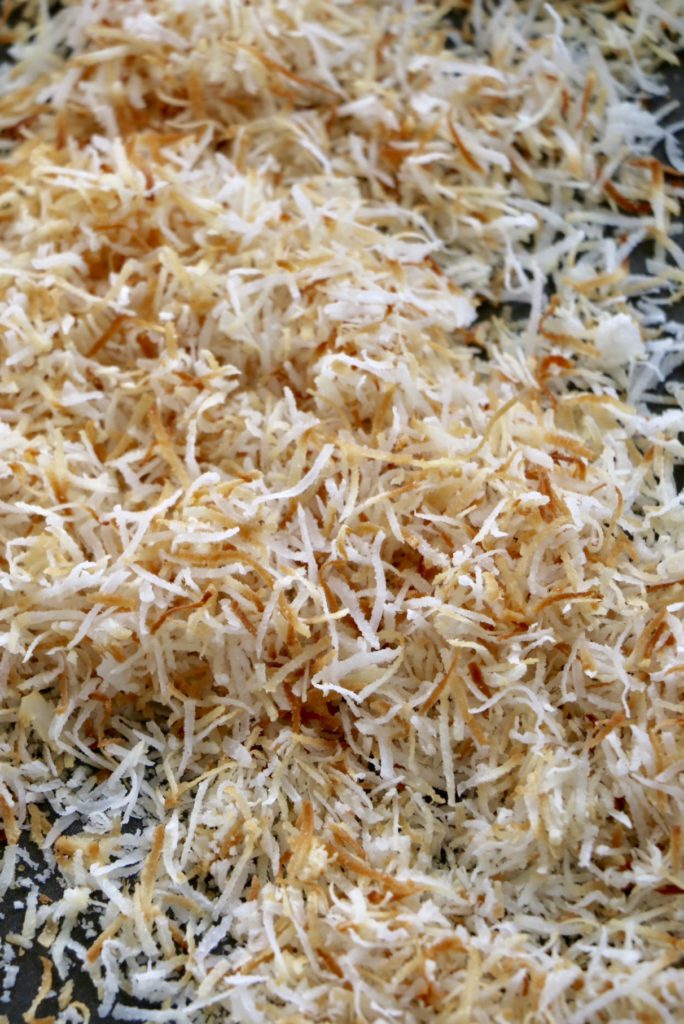
Toasting the coconut gently in the oven so it’s crisp and golden-brown in some places and still blond in others, makes a dramatic difference to its taste and texture, deepening the flavour and adding a light, easy crunch that is wondrous in the filling.
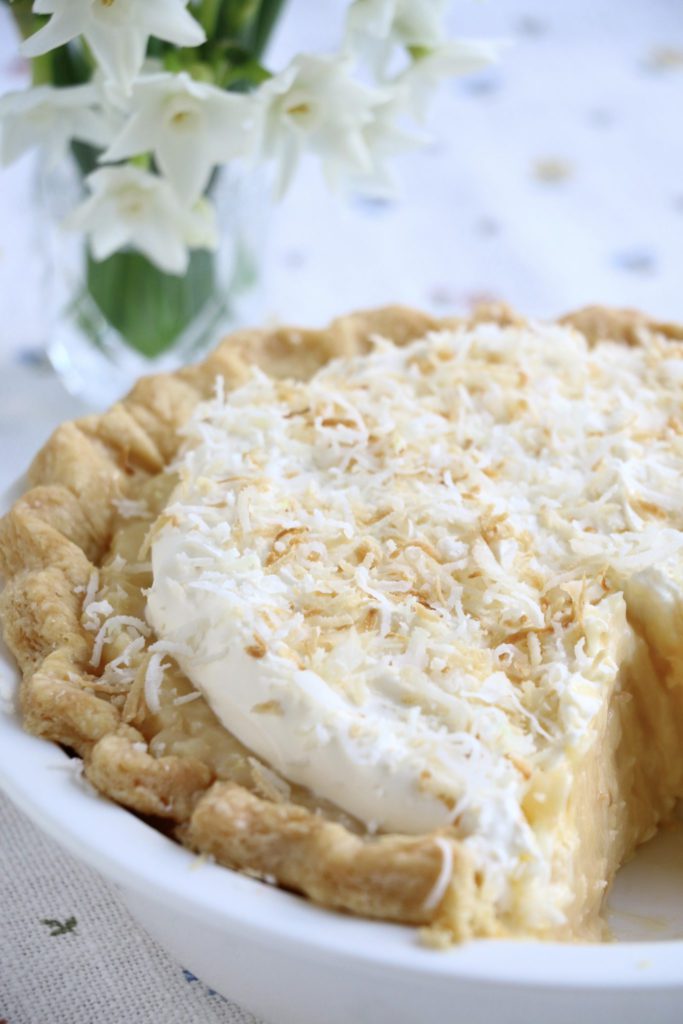
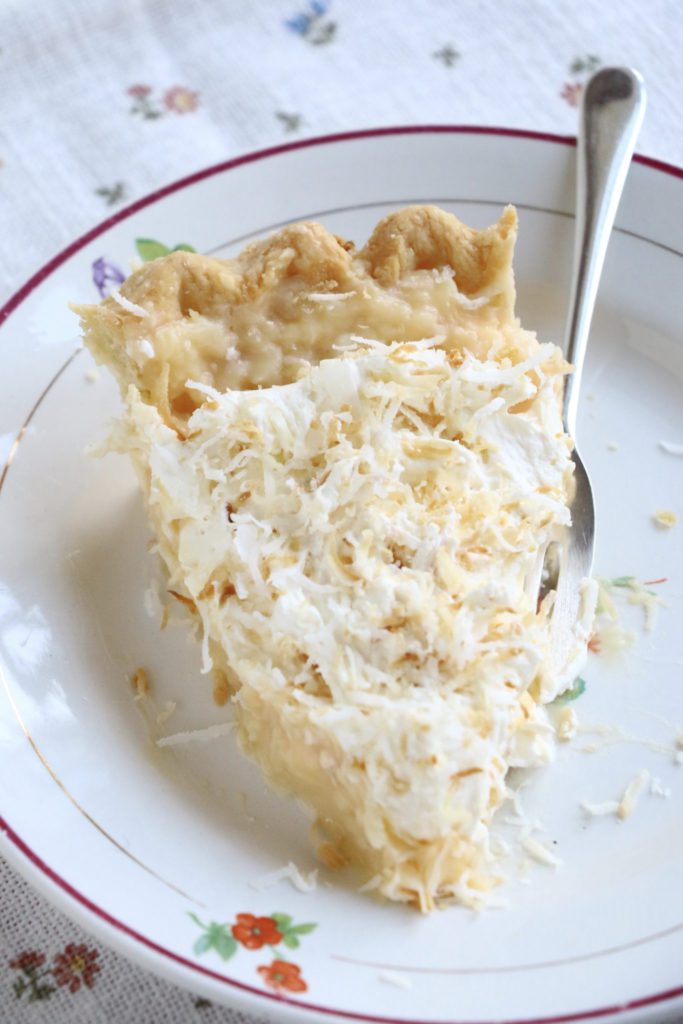
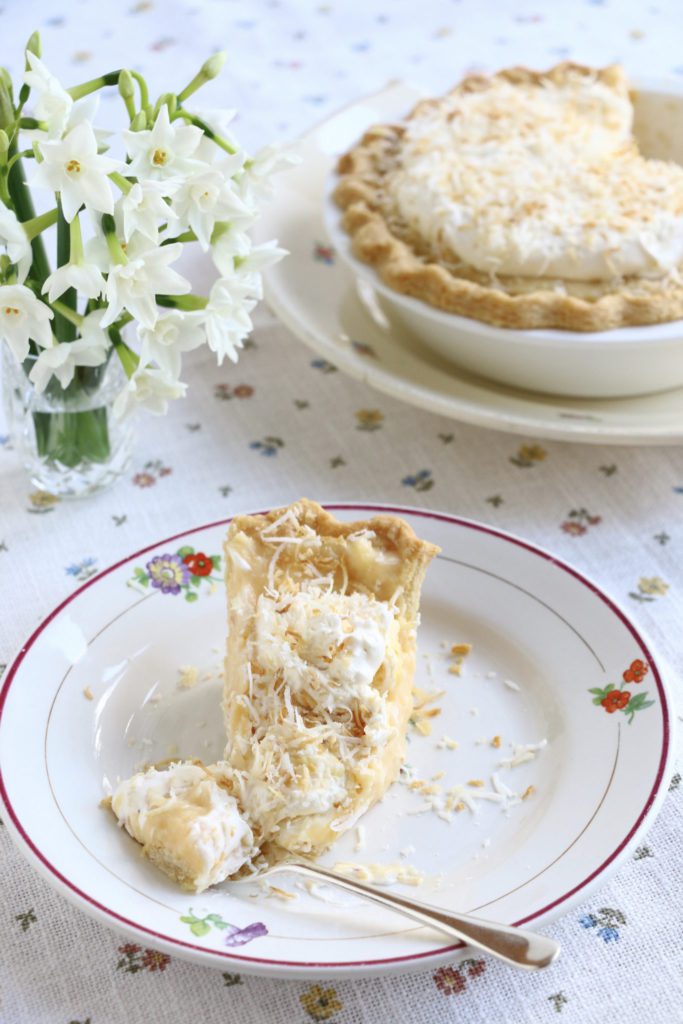 This also-delightful coconut cream pie uses the same filling as the cake. The flaky short-crust is fully baked before being filled with the chilled coconut custard, and the pie is then dolloped with whipped cream and garnished with more toasted coconut. This is the kind of pie the best American diners were once famous for, and how I wish they would come back.
These are two of the most wow-worthy productions I’ve made throughout a lifetime in the kitchen, and I always feel a sense of accomplishment that justifies every delicious mouthful. I am somewhat grateful they aren’t quicker to make, as resistance is utterly, gorgeously, useless.
 RECIPES
I. Tips for preparing fresh coconut
- You will need a larger coconut if you want enough to cover the cake generously; a smaller coconut is enough for the pie.
- Find a secure and sturdy surface to crack the coconut — you don’t want to damage your work surface or floor — the shell can be sharp, and the hammer can miss. Be well careful of fingers.
- Before attempting to crack the coconut open, drill at least two holes into the ‘eyes’ at one end, and pour out the coconut water, which is delicious and can be used in the cake or filling if you like, or just drink it as is.
- Once you’ve opened the coconut in two or more pieces, prise it from the hairy outer shell, and proceed to remove the thin, dark skin that’s firmly attached to the flesh with the help of a sturdy vegetable peeler. This takes some time, so it’s good to have help (or something diverting to listen to on the radio).
- Once the coconut is peeled of all dark skin, grate the white flesh. I do this piece-by-piece with the finer end of my hand-held grater, which produces nice, long strands. You can also use the fine grater on a food processor and make faster work of it. You could divide the labour and do this task a day or two ahead of making the cake or pie. Just store the grated coconut in a tightly sealed bag in the fridge. You can also freeze the grated coconut; thaw before toasting.
- To toast the grated coconut for the cake or pie filling, spread it not-too-thickly on a large baking tray, and dry it in a 175C/350F oven for about 15-25 minutes, giving the coconut a mix every 5-10 minutes to encourage the darker bits into the centre and the paler strands to the outside where they will colour faster. Don’t let the coconut turn uniformly brown — it’s best when dry and crisp, but with variations of colour. You can also be guided by your nose: the coconut will begin to smell temptingly toasted as it starts to change hue. Watch it carefully and stir more frequently at this stage. Let the tray cool on a rack until completely room temperature. You can toast the coconut a day or two ahead and keep it airtight in a dry place.
 II: Toasted-coconut-custard filling
Adapted from Diane Rossen Worthington, The Best of Casual American Cooking: Diner (Sunset Books, 1995)
This is the filling that goes into both the coconut cream pie, and the coconut cake. This quantity is enough for one 20-23cm (8- or 9-inch) deep-dish pie, or three-layer cake.
*If you use sweetened coconut instead of toasting fresh coconut, decrease the amount of sugar in the custard by 2 tablespoons.
Adding a small amount of gelatine makes the pie cut neatly, and helps the coconut custard to hold more firmly as a cake filling, too. Always add the gelatine to cold liquid, and not the other way around. Don’t stir the granules; just allow the gelatine to soften for several minutes. It will dissolve completely once added to the hot custard. Never allow the custard to boil once the gelatine is added, as boiled gelatine tastes awful.
Ingredients:
- 150g (¾ cup) caster sugar or (US granulated sugar) *NOTE: decrease sugar by 2 tablespoons if you use sweetened coconut instead of fresh
- 30g (¼ cup packed) cornflour (US cornstarch)
- ¼ teaspoon cooking salt
- 4 egg yolks, large or extra large
- 690ml (2¾ cups) whole milk, cold or room temperature
- 1 level teaspoon granular gelatine softened for 10 minutes in ¼ cup of cold milk or in fresh coconut water
- 2 teaspoons vanilla extract
- 120g (1 generous cup) toasted fresh, unsweetened coconut [See recipe I, “Tips for preparing fresh coconut”]
Directions:
- Put the sugar, salt and cornflour (cornstarch) into a heavy, medium-large saucepan, off the heat for now, and whisk thoroughly. Make sure no lumps of cornflour remain.
- Mix together the egg yolks and the milk in a large measuring jug. Gradually whisk the liquids into the dry ingredients in the saucepan, continuing until the mixture is smooth.
- Put the heat on medium under the saucepan and whisk regularly as it heats up and begins to thicken. Scrape the bottom and sides of the saucepan often with a silicone spatula, and continue to whisk regularly, to keep the custard smooth and lump-free.
- Bring the custard gradually to a boil, which should take about 8-10 minutes, stirring constantly as it gets hotter and thicker. Once it reaches a boil, let it bubble gently for one minute longer, scraping and whisking all the while.
- Remove the pan from the heat and add the softened gelatine, and then the vanilla extract. Do not return the pan to the heat at this stage, as the gelatine must not boil. Stir well for a few minutes off the heat to dissolve the gelatine completely, and then strain the custard into a clean bowl. Add the toasted coconut, stir well, and cover with clingfilm in direct contact with the custard: this will prevent a skin from forming. Let the finished custard cool completely and refrigerate for at least 3 hours or overnight, until firm and cold. Proceed with the recipes for the coconut cake or cream pie.
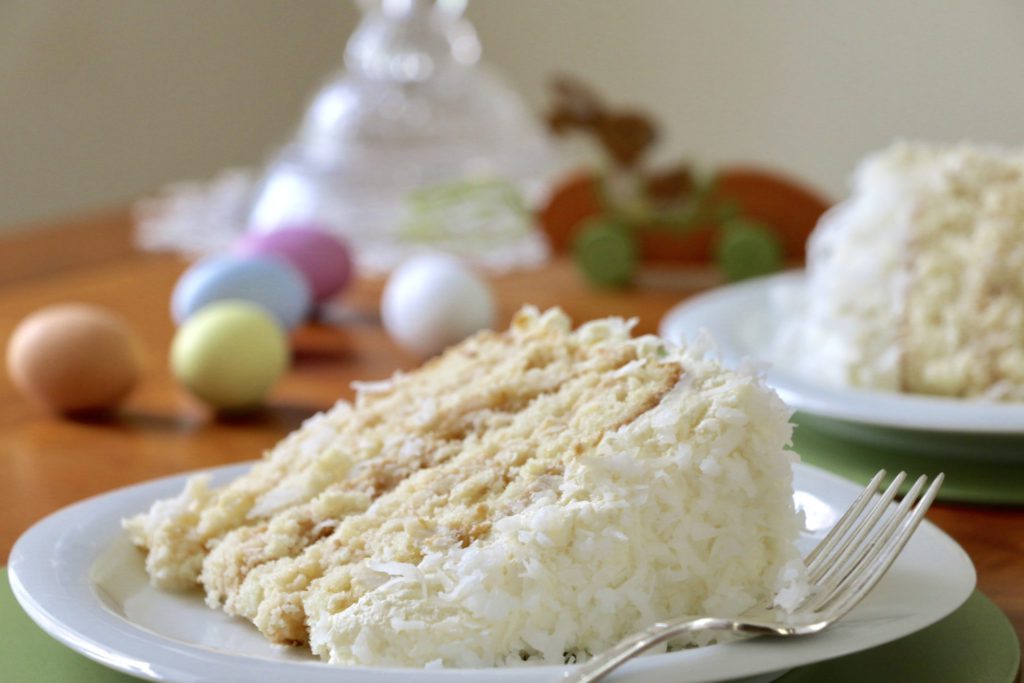 III. Fresh coconut cake with toasted-coconut-custard filling and whipped cream frosting
The recipe for the yellow cake layers is from Alice Waters’s, The Art of Simple Food (Clarkson Potter, 2007).
Makes one 20-23cm (8-9 inch) three-layer cake, serving 12-14
Ingredients
For the cake:
- 225g (1 cup or 2 sticks) unsalted butter, softened
- 400g (2 cups) caster sugar
- 4 large eggs, separated
- 390g (3 cups sifted before measuring) plain or ideally soft “00” flour, or cake flour
- 4 level teaspoons baking powder
- ½ teaspoon salt
- 250ml (1 cup) whole milk, room temperature, or substitute some for the equivalent amount of fresh coconut water
- 1 teaspoon vanilla extract
For assembly:
- 1 recipe toasted-coconut custard, well chilled (see recipe II, above)
- Whipped cream ‘frosting’, as follows:
- 500ml (2 cups) double (heavy) cream, as fresh as possible
- 3 tablespoons sifted icing sugar (confectioners’ sugar)
- 1 teaspoon vanilla extract
- 2 cups grated fresh coconut, untoasted (or toasted if you prefer)
Directions
Make the toasted coconut filling first so it can chill (recipe II, above).
Make the cake layers:
- Heat oven to 175C/350F. Butter and flour three 20-23 cm (8-9 inch) cake pans.
- Cream together the butter and sugar for 5-8 minutes until light and creamy. Add the egg yolks one at a time, and then the vanilla.
- In a separate bowl, whisk together the dry ingredients. Add them in three goes to the creamed butter and egg mixture, alternating with the milk (start and end with dry ingredients). Mix each time just until no clumps of flour remain; don’t overbeat, or the cake will toughen. Scrape the bottom and sides of the bowl a couple of times to make sure ingredients are well incorporated
- In a clean bowl, with clean beaters, whisk the egg whites to the soft peak stage — they should be light and voluminous, and the tips should flop over a little on the beaters instead of standing firm. Mix a good spoonful into the cake batter to loosen it; then carefully fold in the rest of the whites, in three additions, being careful not to deflate the batter.
- Distribute the batter equally into the prepared cake pans and smooth the tops. Check the centres aren’t thicker than the sides.
- Bake until a skewer comes out dry and the top springs back — about 30-40 minutes; check after 25 minutes. Rotate the cakes halfway through baking to help them bake evenly. Cool the layers for about 10 minutes in the pans, and then invert onto a rack to cool completely.
Whip the cream for the ‘frosting’:
- Put the chilled cream, sifted icing sugar, and vanilla, into the clean bowl of an electric mixer. Using clean beaters, whip the cream until it is thick enough to spread, but don’t overbeat or it will separate. It will continue to thicken as you spread it on the cake, so stop beating a little before you think it’s thick enough.
Assemble the cake:
- Choose a flat cake-plate or -stand that’s about 3 inches larger in diameter than your cake layers. Before assembling the cake, protect the plate with four narrow sheets of parchment paper or foil placed to cover the edges; you will pull these out from under the cake once it’s frosted and decorated, to reveal a clean serving plate.
- Choose the best cake layers to go on bottom and top. Place the bottom layer upside down on the centre of the serving plate, so the flat side is facing up. Cover this bottom layer with one half of the cold toasted-coconut-custard filling, and spread it level using a metal spatula.
- Place the middle layer of cake on top of the custard, again placing the cake so the flat side is up. Cover this layer in turn with the remainder of the custard filling.
- Top the second layer of custard with the final cake layer, again so the flat side is up.
- Spoon a good amount of the whipped cream on top of the cake, and using a clean metal spatula, spread it level, with a little hanging over the edges. Don’t overwork the cream: the coconut will cover imperfections, and fussing too much will make the cream stiffer and more inclined to split and become buttery.
- Now start frosting the sides of the cake with more whipped cream, working up with the metal spatula meet the cream hanging over the top edge. Give the sides a quick check for evenness, and patch as necessary.
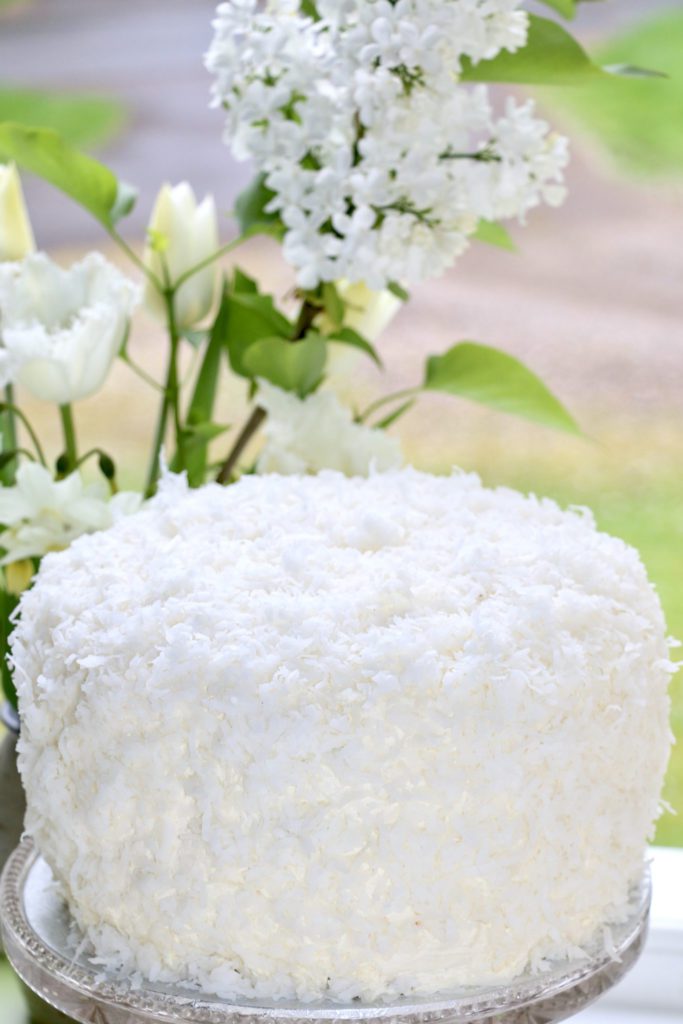
- When the cake is fully covered with the whipped cream, use one cupped hand to press the grated coconut gently into the surface of the cream, just deep enough for it to adhere. When the sides are covered as evenly as possible, sprinkle more coconut over the top.
- Refrigerate the cake for at least a couple of hours to mellow, and bring out of the fridge about 20 minutes before serving to soften slightly. Don’t leave it out for more than two hours, and less if it’s a warm day. Eat within two or three days, depending on the freshness of your cream, and keep leftovers refrigerated.
Makes one 20-23cm (8-9 inch) pie, serving 8-10
The pie crust is fully baked (‘baked blind’) before the chilled filling is added.
Ingredients:
- 1 fully baked room-temperature short-crust pie crust (recipe V, below)
- 1 recipe toasted coconut custard filling, cold (recipe II, above)
- 250ml (1 cup) double (heavy) whipping cream, cold
- 2 tablespoons sifted icing sugar (confectioners’ sugar)
- ½ teaspoon vanilla extract
- 30g (about ½ cup) toasted coconut for garnish
Directions:
- Spoon the cold coconut custard into the fully baked pie shell, and smooth out any lumpiness with a spatula or large spoon.
- Whip the cream with the icing sugar and vanilla, just until mounding enough to hold a gentle shape: don’t over beat, or the cream will split and become buttery. It’s much nicer when loosely whipped.
- Spread the whipped cream over the surface of the cold coconut custard, and sprinkle the toasted coconut over the cream. Chill the pie for at least one hour until serving, and keep leftovers refrigerated.
- Slice using a serrated knife, and wipe the knife between slices for the cleanest cut.
V. Flaky pie crust
Adapted from Chez Panisse Desserts (Random House, 1985)
This makes a dough that is flakier and easier to roll than an all-butter crust.
This quantity will give enough for two 20-cm (8-inch) single crusts; it can be frozen for three months.
Ingredients
- 260 g (2 cups) all-purpose flour
- ½ teaspoon salt
- 1 teaspoon sugar
- 140g (5 ounces or 11 tablespoons) unsalted butter
- 55g (2 ounces or 3 tablespoons) vegetable shortening (I use Flora)
- 3½ tablespoons iced water
Directions
- Cut butter and shortening into the dry ingredients with a pastry cutter or your fingertips until you have a well-mixed consistency with some larger pieces of butter remaining. It should not be a fine ‘sand’, but should have a few pea-sized lumps, as these translate to flakiness when baked.
- Add 3 tablespoons of the ice water and mix lightly until the mixture has a texture resembling rags.
- Work the pastry a little with your hands to bring the dough together, and add the remaining half-tablespoon water if it is too dry. Don’t overwork it, as this will make the dough shrink.
- Halve the dough, and wrap each half in clingfilm. Leave it to chill in the fridge for at least 30 minutes, or better yet one hour — and up to 24 hours; the gluten will relax, making a more tender dough that’s easier to roll, and the moisture will also continue to penetrate.
- Roll half the rested pastry between 2 sheets of cling film, or on a lightly floured pastry board, into a circle about 5cm (2 inches) larger in diameter than your pie pan. Aim for a thickness of about 6mm (¼ inch) thick. Avoid making the centre thicker than the sides, and don’t use more flour in the rolling than you must.
- Lightly butter the pie pan and wipe off the excess. Line the pan with the rolled pastry, and press it gently into the sides with your fingers, leaving the excess to hang over the lip for now. Trim off any unwieldy excess and crimp the edges as decoratively as you wish. Save the scraps in case you need to do any repairs.
- ‘Dock’ the base of the pastry with a fork to create steam holes and cover the pastry lightly with cling film and refrigerate to rest for a minimum of an hour — or up to 24 hours. This will keep it from shrinking when baked.
- When ready to proceed, lightly butter a sheet of parchment paper large enough to fit inside the pie shell, scrunch it up, and then unfold it and place it buttered side against the pastry to act as a liner. Fill with baking weights to keep the bottom of the pastry flat when baking.
- Bake for an initial 15-18 minutes or until set in the centre and slightly golden on the edges, rotating it once in the oven for even cooking. Remove from the oven and carefully take out the parchment lining and the baking weights. If it looks set, proceed. If it’s still undercooked, replace the paper and weights and give it 5 minutes longer to set with them in place.
- When the bottom of the pie crust is set, remove the paper and weights and return the naked shell to the oven to bake for another 10 minutes or so, or until the pastry is a light golden all over. Carefully remove the pie pan to a cooling rack and leave undisturbed until it’s room temperature.
- Proceed with filling and decorating the pie as in recipe IV above, once the crust has completely cooled.
For additional tips on making pastry dough, see “Troubleshooting shortcrust pastry”.
 Other coconut recipes on Crumbs on the Table:
Other 1-2-3-4 cake recipes on Crumbs on the Table:
Other pie and tart recipes on Crumbs on the Table:
- Blueberry pie
- Strawberry and white chocolate tart
- Tarte au citron (classic lemon tart)
- “Troubleshooting short-crust pastry, sweet and savoury”


 Tour D’Argent: a remembrance of things past at today’s prices
 Apricots, les abricots
 I used to cook in a piggery


 Seed cake and story



 Easter is late this year
WOW — what a feast for the eyes, Laura!
Have a relaxing Easter (break, I hope).
Iris and Pascale
Many many thanks, Iris and Pascale, for your lovely compliment. Hope you and yours had a relaxing and lovely Easter.