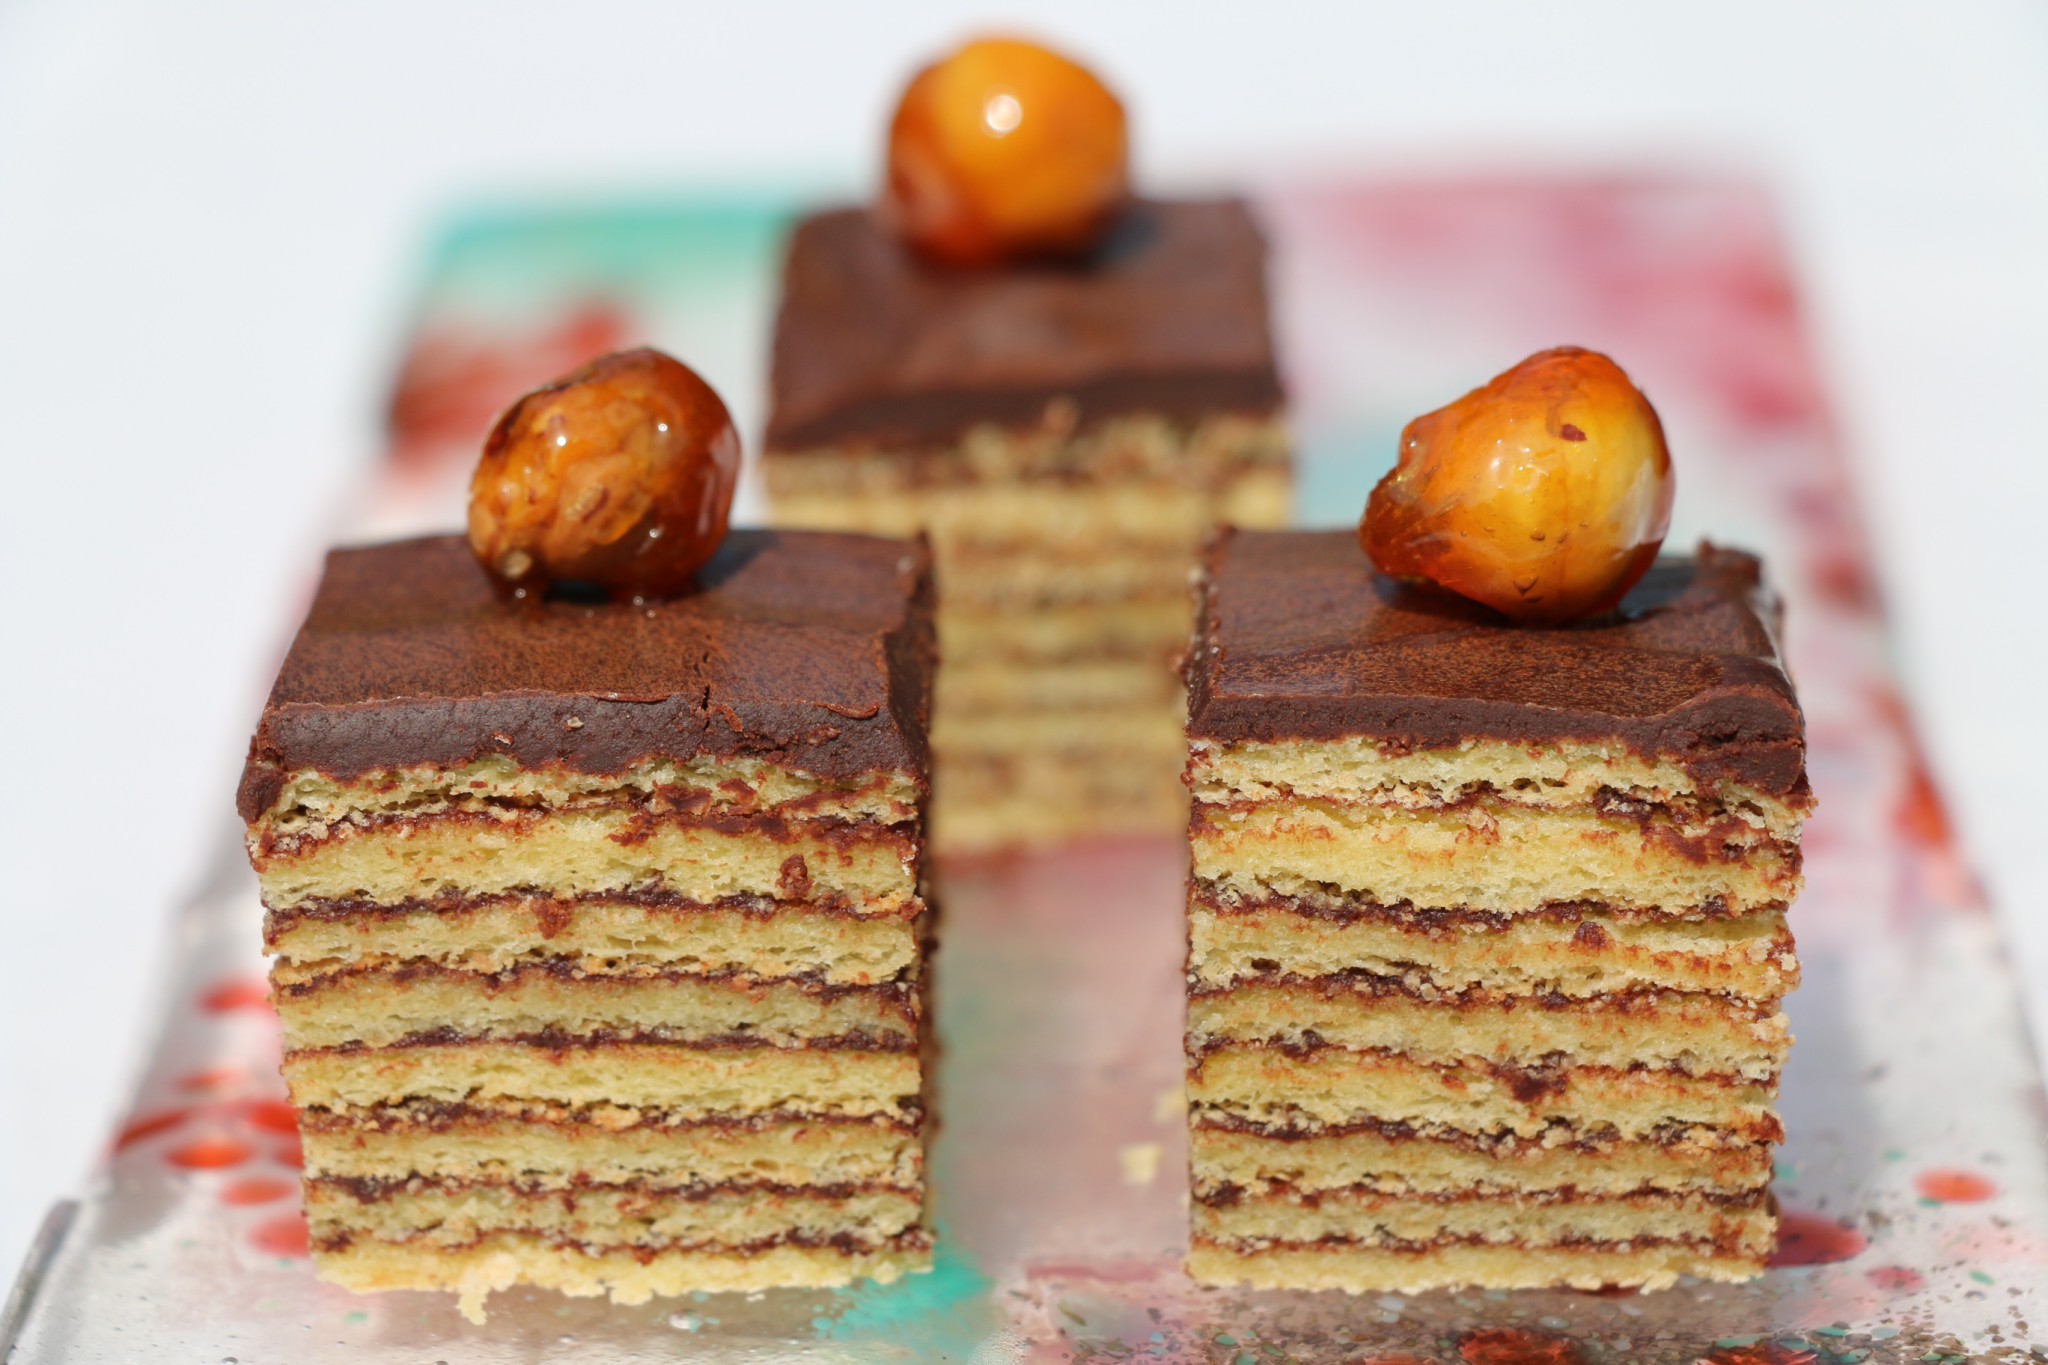
 Dobosh torte is a Hungarian speciality, a virtuoso show-stopper of a cake. Budapest confectioner Jozsef C Dobos developed it in 1884 to be both spectacular and transportable, as he was an entrepreneurial chap who wanted to send his exclusive creations some distance to wealthy customers — not feasible with the elaborate cream-filled cakes of the day. Thin layers of sturdy sponge separated by a novel chocolate buttercream, and topped with a hard caramelised sugar, helped the original Dobostorta both to impress, and to survive their journeys.
Today this splendid confection is still a spectacular of sturdy yet moist layers filled with either chocolate buttercream or ganache, now often topped with praline, which is easier to make, cut and eat than the original top-coat of hard caramel, and just as delicious, if not more so. You know you are celebrating when this torte is on the table.
My mom made this wonderful creation for Christmas, and even packed it up to send off to her daughters in college, bless her a thousand times for that bit of life-saving cheer. I have since appropriated the recipe as one of my own holiday traditions, and have made a few dozen over the years (not just at Christmas). It is universally loved by those who taste it, and of course it looks amazing with all those neat layers — the usual number is now around seven, though originally it was five, and still is in many pastry shops today in the home of its inventor.
The traditional shape is round, which involves the drawing of circles onto parchment and the careful spreading of batter, and subsequent trimming of edges. I sometimes streamline the process (especially when baking these in quantity) by spreading the batter onto a rectangular baking tray, and then cutting the resulting layers into thirds for a rectangular cake. I like this look, for its sharp edges are pleasing with the geometrical neatness of the layers. It makes impressive petits fours this way, too. But the round cake is festive and beautiful, and it’s a treat to make one in the authentic shape.
Dobosh torte lasts well, up to a week if kept airtight in cool conditions. It also freezes beautifully; wrap well when the chocolate has set and defrost with the wrapping intact so the condensation stays on the outside.
Two recipes are provided here for the chocolate: an enriched buttercream using raw egg yolks; and a ganache using only chocolate, sugar, butter and water. Choose one or the other as you like. The same mixture works between layers and on top.
Breaking it down into its constituent parts, the Dobosh torte is not too daunting. It takes patience and a bit of care, but the sponge layers themselves are straightforward, and so is the chocolate element. Assembly is pretty forgiving, too, if something of an assembly line. You will need time and freedom from other calls on your attention, but allow yourself the better part of a day to get into it, and you’ll be proud of the result.
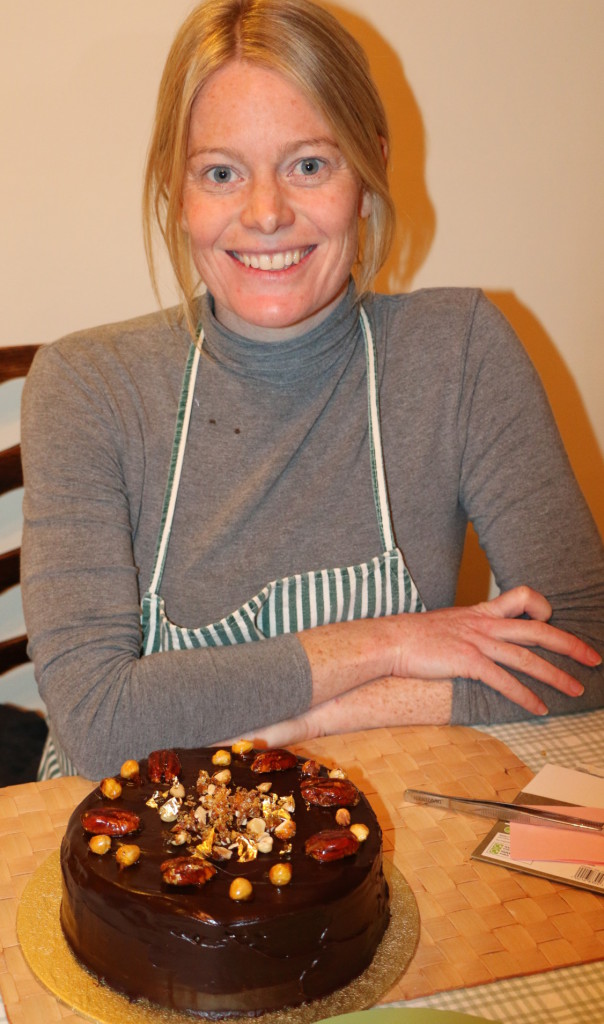
Ali and I will take you through the steps. This was her first Dobosh torte, and she created a masterpiece!
Note on the number of layers: The number of layers you get from the amount of batter given in this recipe will depend on how large or small you draw your circles and how thinly you spread the batter. A 23cm cake (9in) will make seven to eight layers. A 20cm (8in) cake could give you up to 12-14 layers. The amount of chocolate buttercream and ganache called for here allows for this extra.
Serves 12
Recipes are given separately for the torte sponge-layers, the chocolate icing, and the praline decoration.
I. The torte sponge layers
Ingredients:
- 7 large eggs, separated
- 3 additional egg yolks
- 454g (one pound) icing sugar, sifted (confectioners’ sugar)
- 100g plain flour (¾ cup, sifted before measuring)
- ¼ teaspoon salt
- 1 teaspoon vanilla extract
- 2 teaspoons lemon juice
Directions:
1. Heat oven to 200C/gas mark 7.
2. Prepare pans (see note above* on the number of layers):
- Tear off 8 or more sheets* of baking parchment to fit your baking trays, and butter and flour an area in the centre that is about 2.5cm (1 inch) larger in diameter than you want the finished layers to be (this allows for the batter to spread when baking; you will trim each one once it’s baked). Shake off excess flour.
- Using a plate or other round object the size you want your cake to be, trace a circle onto the prepared area with the blunt end of a knife, a skewer, chopstick, etc. This will be your guide for spreading the batter.
- You can do these steps before placing the prepared parchment onto your baking sheets. When ready to proceed, anchor the parchment to the baking sheet/s with a little butter at each corner to keep the paper from flipping onto the batter.
- Separate the eggs, putting the 7 whites into a completely clean large mixing bowl, and the 10 yolks into another large mixing bowl. Set aside the whites for now.
- Beat the yolks at high speed for 3-5 minutes until pale lemon coloured (a standing mixer is ideal, but you can use hand-held beaters).
- Lower the speed to the minimum setting and gradually add the icing sugar until it’s all incorporated, scraping down the sides of the bowl to get it all. Turn the speed up again and beat on high until very thick, about 5 minutes.
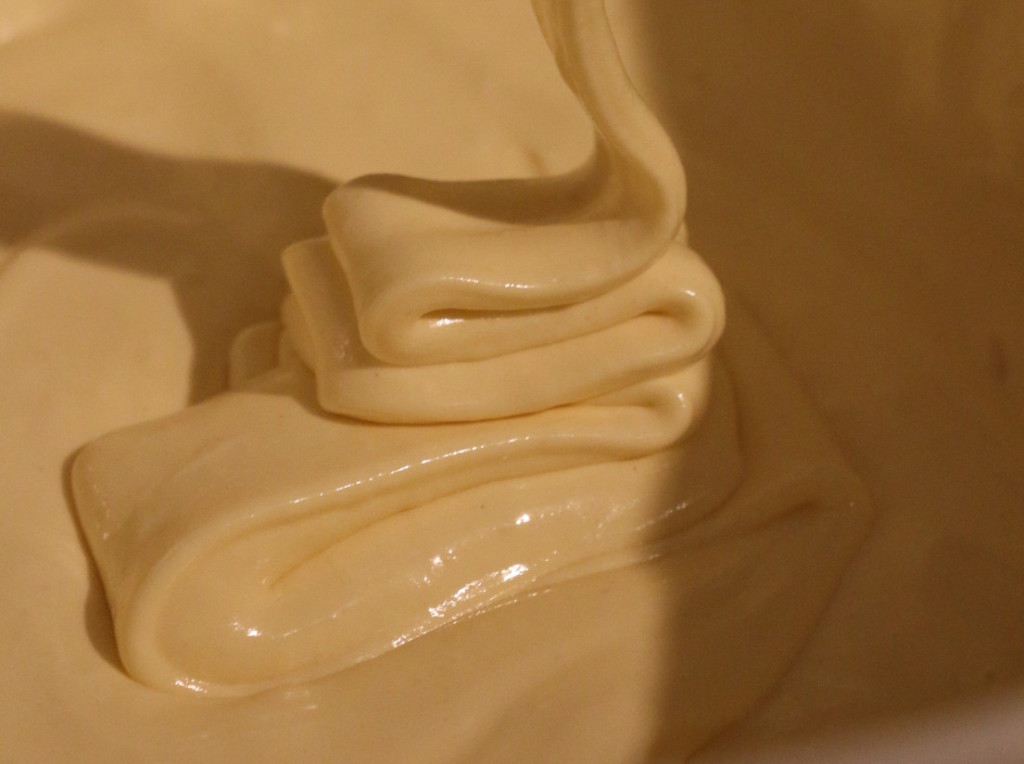
- Reduce speed and add the flour. Increase speed to high again and beat for another 5 minutes. The batter will be very thick, almost stiff, and will fold in ribbons upon itself (see photo above).
- Add the vanilla extract and lemon juice, and beat in gently.
- Now beat the 7 egg whites you’ve set aside in the second bowl, adding the salt. Beat them with the whisk attachment until stiff but not dry. Test with a clean, dry, whole egg in its shell: place it gently on top of the beaten whites; if the egg sinks just a little, about ¼”, the whites are perfectly beaten. If the egg sinks further, they need longer. If they sit on top without sinking, you’ve gone too far.
- Add a good scoop of the whites to the thick yolk mixture and stir with abandon to loosen the batter. Then very carefully fold in the remaining whites to the batter, one-third at a time. Fold gently, but completely so there are no pockets of unincorporated egg white. You should end up with a light, mousse-like batter.
- Working with a light hand to avoid deflating the batter, place 3-4 spoonfuls onto your traced circles.
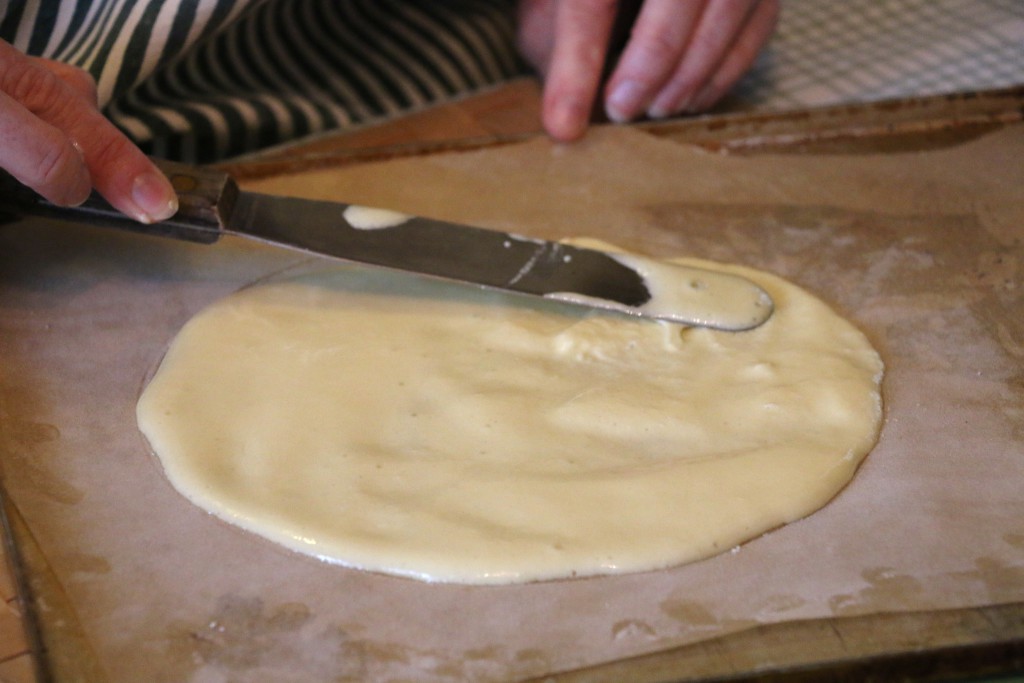
- Using a metal icing spatula or the back of the spoon, gently spread the batter thinly and evenly to fill the circle you have marked, ensuring you don’t leave any holes and that you don’t make the edges too thin, as they could burn. Use as little batter as you can to get even layers without over-working the mixture, and spread carefully to avoid losing volume. Don’t worry if you aren’t exact about keeping precisely to the shape, as the layers are trimmed after baking.
5. Bake the layers: You will need to do this in batches.
- Bake each layer for about 5-7 minutes, and turn the baking sheets, if needed, for even browning. You may need another 2-3 minutes, depending on how thick you have spread the layers. They are done when golden-brown and set.
- With the layers still on their parchment or foil, remove them from the baking sheets onto a rack to cool completely.
- Continue the process of spreading the batter and baking the layers until you have used all the mixture. Leave all the layers to cool on racks; when completely cool, you can stack them (still on the parchment) to save space while you prepare the chocolate filling/icing and praline for assembly.
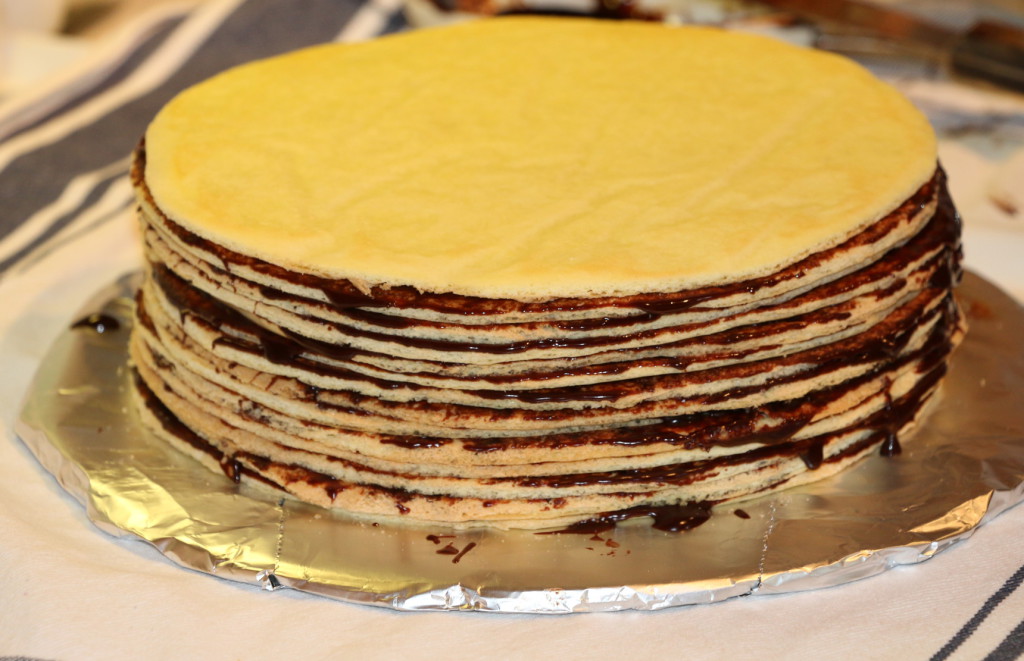 6. Assemble the torte (see separate recipes after these assembly instructions for the chocolate filling/icing and the praline)
- Protect your serving plate with 4 strips of foil or parchment just wide enough to go over its edges. You will pull these out from under the torte once it’s filled and iced. This keeps the plate from getting messy as you work.
- Select your bottom cake layer and peel it away from the parchment it was baked on. Trim it with a pair of kitchen scissors to make a uniform circle with neat edges, following the line you traced as a guide.
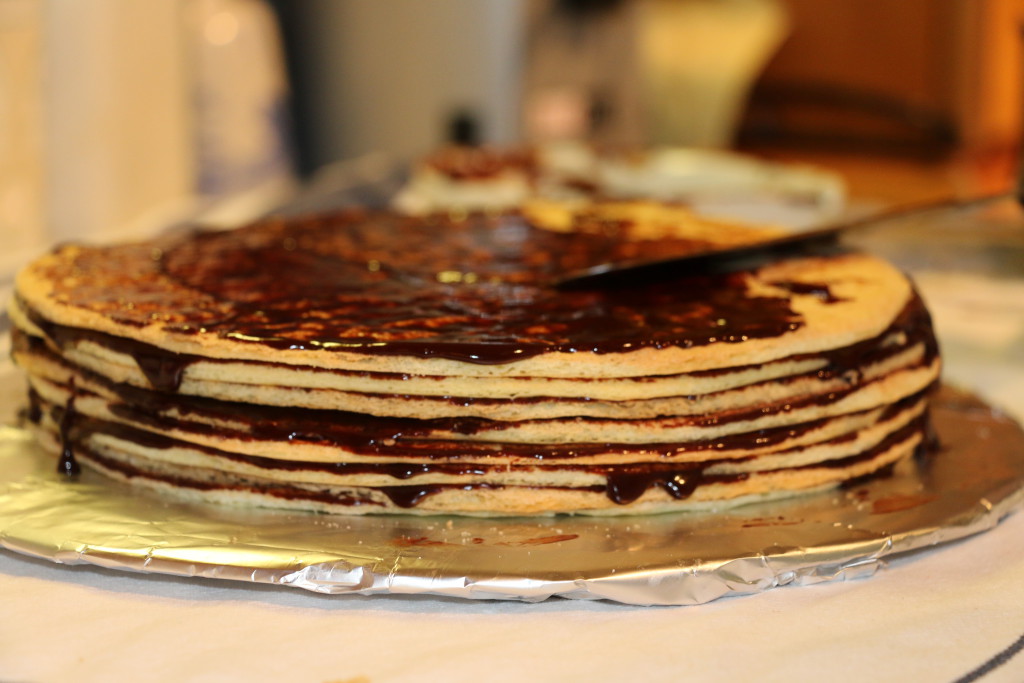
- Spoon a little chocolate filling onto your first layer and spread it very thinly, making sure you get all the way to the edges. The chocolate can have cake showing through. It should be thin, but evenly applied.
- Retrieve your next layer, remove it from its baking parchment, trim it as before, and lay it exactly on top of the iced first layer. Apply another very thin layer of chocolate and spread as before.
- Continue to build up your torte until you have reached your final layer. Place it on top in the usual way, but before you apply the final top coat of icing, check the consistency of the chocolate if using the ganache to make sure it is still pouring smoothly and hasn’t thickened too much while you’ve worked. If it has, gently reheat for a few seconds and stir again to make sure it’s completely smooth. If using the buttercream, it should remain fine for the duration of assembly.
- To ice the top of the torte: Pour or spoon what’s left of your chocolate on top of the torte, coaxing it to the sides, and smoothing it on top. Work it down the sides with a metal icing spatula to thinly cover the torte; you may find it helpful to work from the bottom up. If you are using the ganache, try not to tinker too much with the top once it’s poured, as it will stay smoother if you don’t.
- Decorate the torte with the praline: Once you have a smooth top and sides, apply the praline decoration in whatever pattern you like, bearing in mind how you intend to cut the cake. Remove the protective foil/parchment strips from your serving plate. Leave the torte to set for a few hours. If you slice it too soon the layers may smear.
TO SERVE: A serrated knife is best for slicing this very firm torte. Use a gentle sawing motion and wipe the knife clean after each slice to maintain the neatness of the layers.
TO STORE: Keep airtight in cool conditions, but serve at room temperature once the icing has softened. It will taste better this way than straight from the cold.
 Assembly instructions if making a rectangular torte or petits fours:
- The principles are the same as for the round torte, but instead of shaping each layer as a circle, bake the layers in shallow, rectangular baking trays, lined with parchment and buttered / floured as described above.
- Ice each finished layer with chocolate as described for the round torte, and place each new layer as close to the one/s below it as you can to maintain the shape.
- When you have stacked all the layers, cut the large rectangle into three equal, smaller rectangles (or into four if you want a taller and narrower torte). Bear in mind the size of your serving plate when deciding how to cut. Stick them together with more chocolate. OR if making petits fours, cut each rectangle in half instead of thirds; this will give you more petits fours, with fewer layers.
- You can trim the whole torte again if the edges are uneven, or if needed to fit your serving plate. Use any off-cuts as petits fours.
- Ice as for the round torte, pouring chocolate first on the top and then coaxing it down the sides. Decorate bearing in mind how you wish to slice the torte. The rectangular version of the torte is good sliced thinly, two slices for a serving.
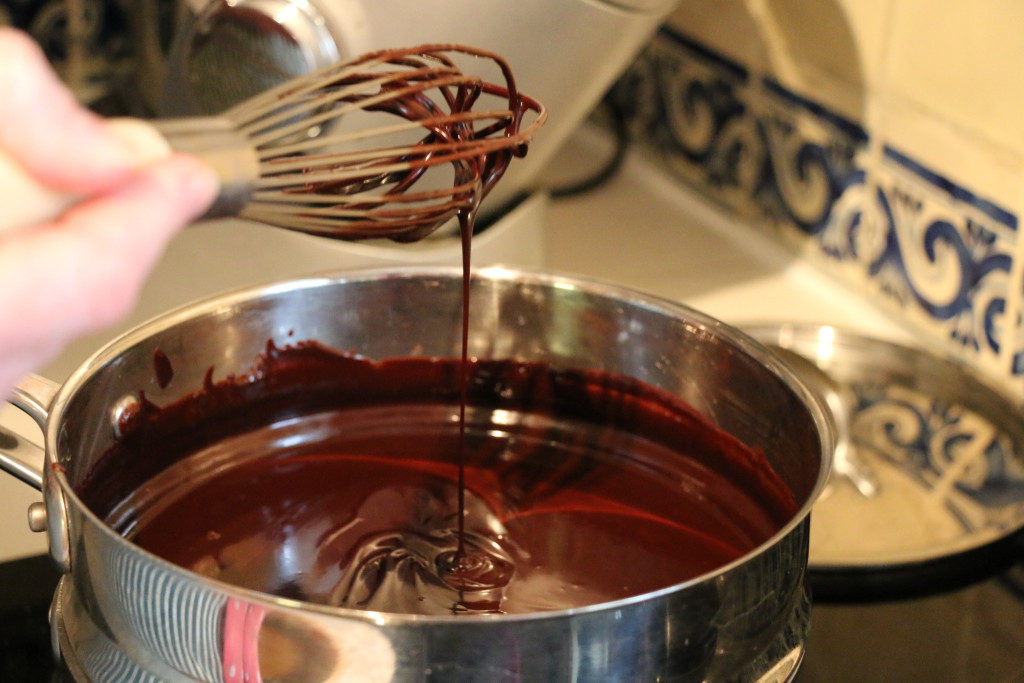 II. Chocolate buttercream and ganache recipes
Note: Choose one recipe, as either one works for both the filling and the finish. The ganache contains no eggs; the buttercream contains raw egg. The ganache-style chocolate will need some time to cool and thicken enough to use. The buttercream version is ready to go as soon as it’s made. If making the ganache, you should make the praline while it sets so it is ready before assembling and icing the torte; the praline will only stick if the chocolate is still tacky (not quite set).
A. Chocolate glaze-style ganache
Ingredients:
- 454g (1 pound) 70% semisweet chocolate
- 150ml water (1/2 cup plus 2 tablespoons)
- 125g caster sugar (1/2 cup plus 2 tablespoons granulated sugar, ideally superfine)
- 140g unsalted butter, room temperature
Directions:
- Put sugar and water together in a double boiler over just simmering water, and stir occasionally until the sugar is completely dissolved.
- Add the chocolate pieces and still until melted and smooth. Make sure the water doesn’t boil, as the chocolate is easily scorched. Remove from the heat when the chocolate is nearly melted.
- Let cool for a moment and then add the softened butter a little at a time; stir until smooth.
- Let stand at room temp, stirring occasionally (but gently so as not to introduce too many air bubbles), until the mixture thickens slightly. This will take about half an hour. If in a hurry, cool in a shallow ice-bath in the sink. The right consistency is reached when you can pour the ganache and it runs somewhat slowly, not rapidly, needing a little coaxing with your spoon or spatula. If applied too soon, it will sink too much into the layers or simply run off.
- If the ganache thickens too much, soften over hot water in a double-boiler for a few seconds, stirring to smooth it again.
- Should the ganache set hard on the torte before you get to the decoration, use a hot spatula to smooth the top, melting the surface just enough so the praline sticks.
Ingredients:
- 454g semisweet chocolate
- 454g unsalted butter, room temperature
- 6 egg yolks
- 2 teaspoons vanilla extra
- Pinch of sea salt
- 30-35g icing sugar (4 tablespoons sifted confectioners’ sugar)
Directions:
- Melt chocolate in the top of a double-boiled over barely simmering water, being careful not to get any water into the chocolate or it will seize. When it is nearly melted, remove from the heat and stir until completely smooth. Set aside to cool completely.
- Cream the butter until light and fluffy in a large bowl. Add the vanilla and then the egg yolks, once at a time, mixing well after each addition. Add the sugar and salt, if using, and continue to beat well, scraping down the sides of the bowl and the beaters to make sure everything is well incorporated.
- When the chocolate is completely cool, add it to the butter/egg/sugar mixture and beat in until completely smooth. The longer you mix, the paler in colour it will get and the more air will be introduced, so stop once you have a smooth mixture. Use immediately.
- Refrigerate the torte once iced, but bring to room temperature to serve, as the buttercream will harder when cold. It is much nicer to eat when softer.
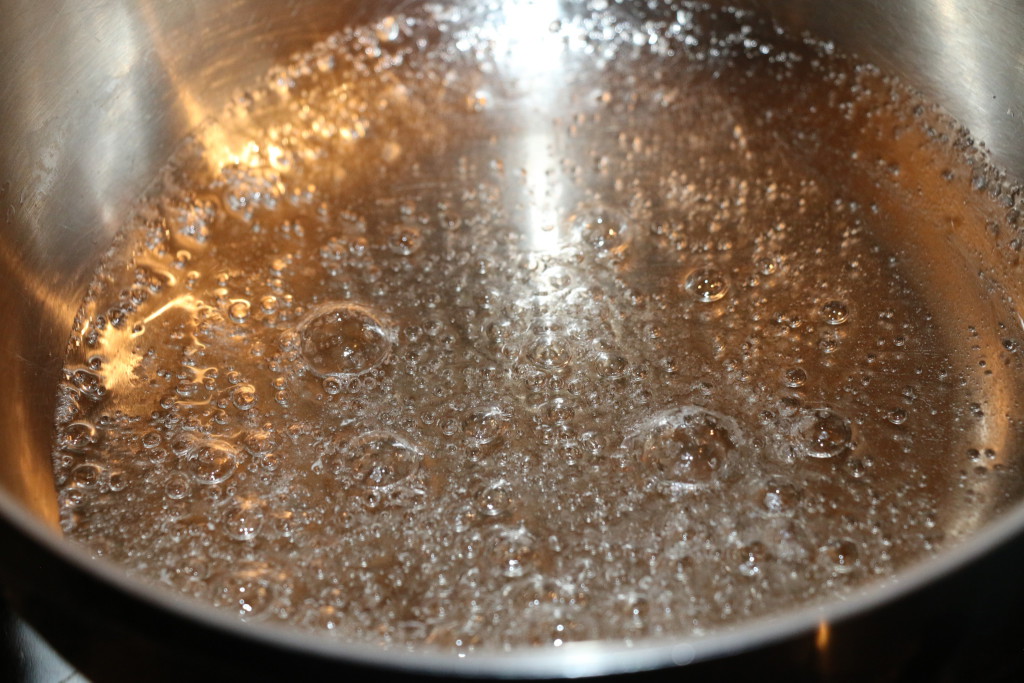 Boiling the syrup for praline once the sugar has completely dissolved.
Ingredients:
- 100g toasted hazelnuts (or pecans, or a mix)
- 100g caster sugar (1/2 cup granulated sugar, ideally superfine)
- 30ml (2 tablespoons) water
- (optional) pinch of sea salt
Directions:
- Have ready a buttered baking sheet.
- In a light-coloured saucepan (so you can watch the colour change), combine the caster sugar, salt if using, and the water. Set over medium heat. Watching carefully, and without stirring (you can swirl the pan a little), allow the sugar to dissolve completely. This will take a while and it must not boil until the mixture is clear.
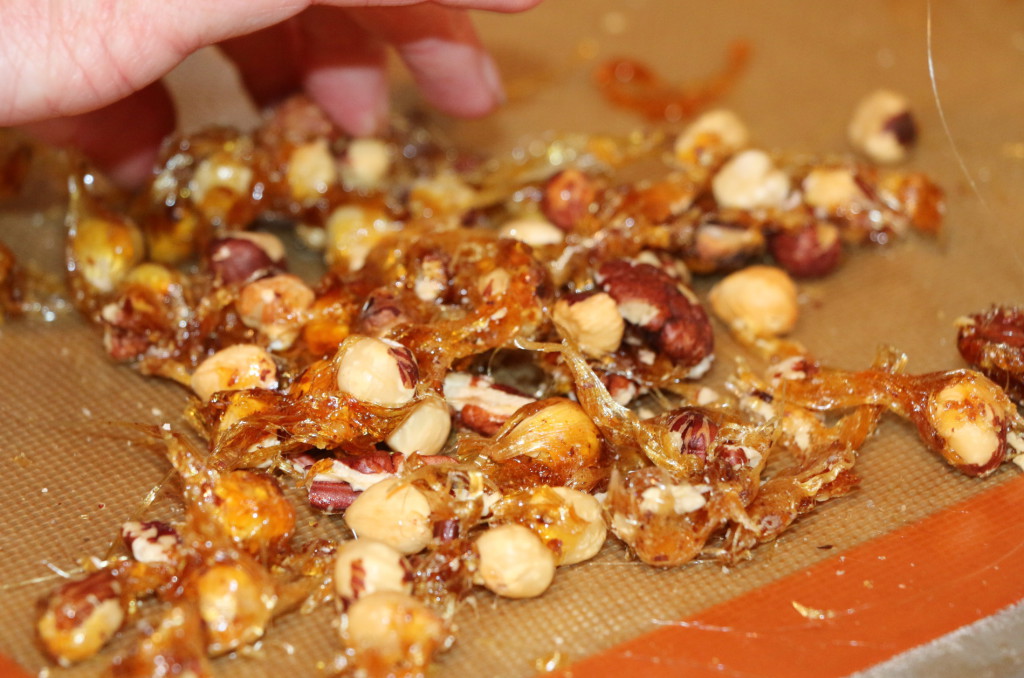
- Continue to boil until it starts to take on colour, and at this stage watch it carefully as it will get away quickly. Don’t let it burn; (If you smell it scorching, start over.) You’re looking for a light to medium amber, and as soon as you reach that colour, remove the pan from the heat.
- Quickly add the nuts; roll them around to coat in the caramel, and then pour them onto a buttered baking sheet to cool, separating them out with a fork. Be careful! They will be very hot and caramel sticks! (When finished, put the pan in to soak for a while to clean.)
- When the caramelised nuts are cool, chop them coarsely, in halves, or use them whole if you prefer. You can also pulverise them to a powder if you like.
- Apply as decoration to the top of the torte in any pattern you find pleasing, or simply scatter them randomly. Add some gold leaf for an extra sparkly touch.
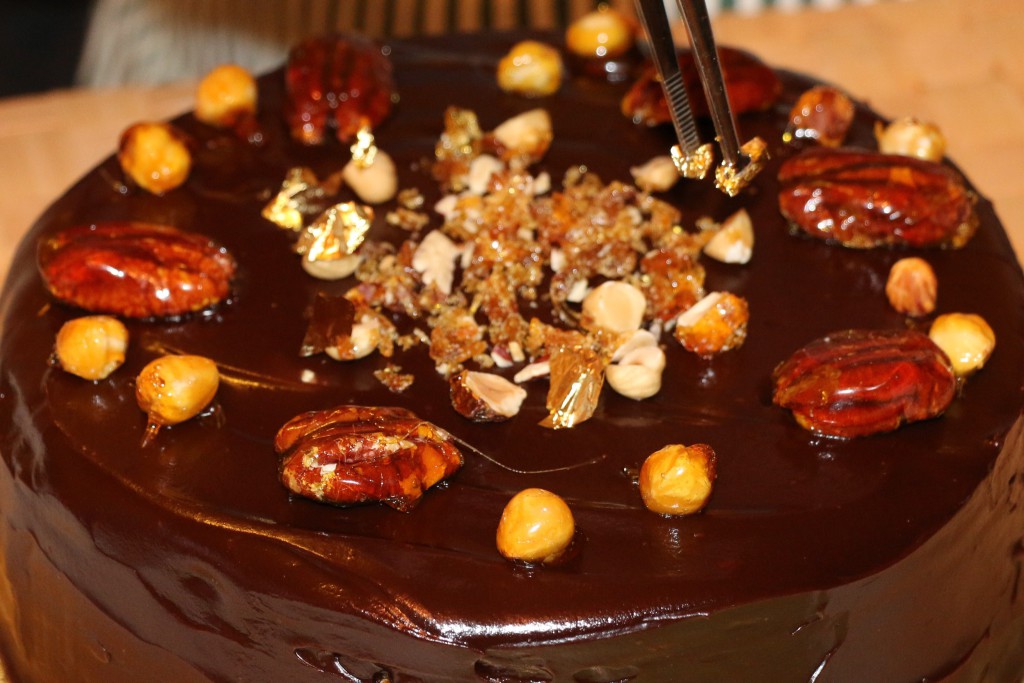 Congratulations to Ali on her magnificent first Dobostorta, made in our one-to-one workshop.



 Tour D’Argent: a remembrance of things past at today’s prices
 Apricots, les abricots
 I used to cook in a piggery



 Seed cake and story



 Easter is late this year
Leave a Reply