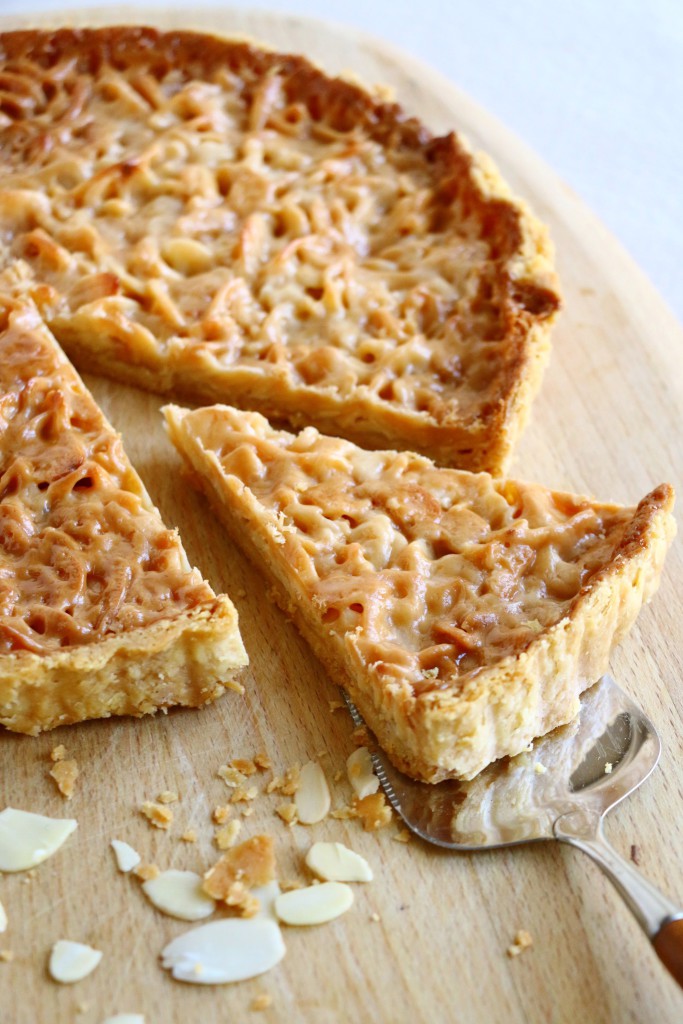
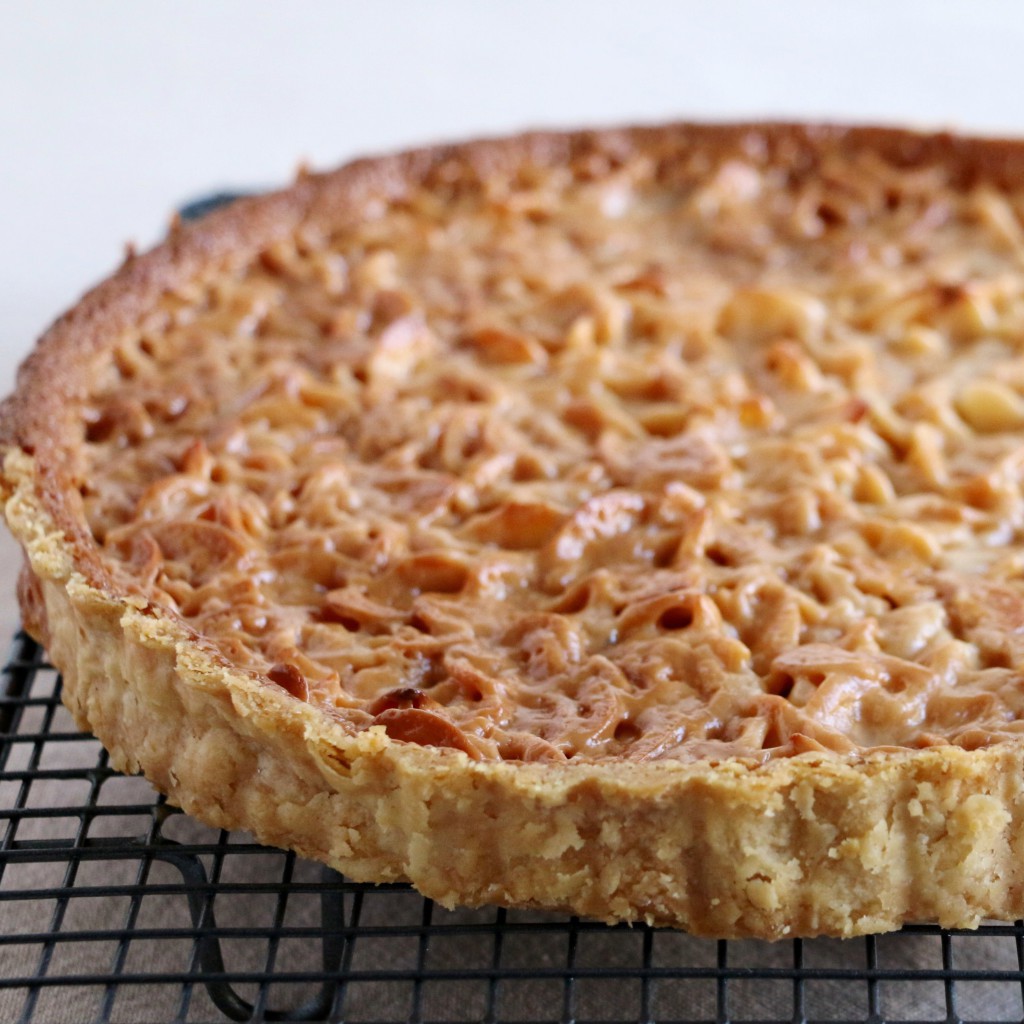
 The Chez Panisse almond tart has a loyal following to this day, almost forty years after it was first developed by pastry chef Lindsey Shere for the Berkeley restaurant that started the American food revolution. Sophisticated and delicious, this tart is still perfect when you want something nutty and caramelised to end a meal on a high, without it being overly sweet or cloying. It’s a special treat, but not a gooey extravaganza. It has a rich and surprisingly complex flavour: roasted almonds, of course, well coated in a delicious caramel of cooked cream and the right amount of sugar (and a perfectly judged pinch of salt), with the addition of Kirsch and Grand Marnier elevating it to a masterpiece. Its fragrance of toasted almonds and caramel raises expectations as much as its glossy golden-brown elegance.
Its texture is a key attraction, too. The almonds have just the right amount of softness, crispness and chew, nothing stick-to-the-teeth about them; and the buttery pastry — flavoured with almond and vanilla — is rolled thinly enough to be a discreet partner to the filling. It’s not one of those tarts where you leave behind an over-thick crust to focus on the filling. The caramelised almond and pastry in this tart work as a team.
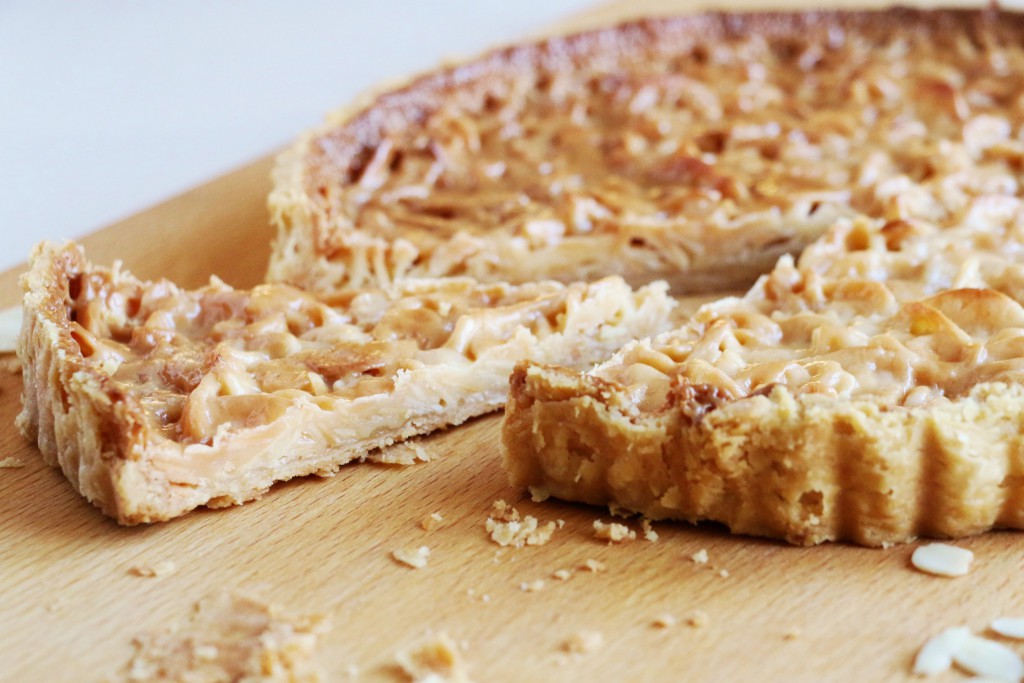 I adore this tart for a dinner party or buffet. It’s one of those recipes that combines exceptional taste with practicality. It requires some effort, yes, but can be done ahead and needs no refrigeration and no accompaniment when served. It’s perfect as it is, with a liqueur or coffee to follow. (If you are doing a multi-course meal that includes cheese before the sweet, in true French fashion, it would also work well — and one almond tart could serve ten people in this case instead of the eight it serves when it’s the sole dessert.)
It requires four separate steps, all of which can be tackled in advance, with nothing left to do on the day except bring it to the table. The sequence is this: 1) make the pastry up to two days ahead, or even further in advance and freeze it. 2) Roll it out, rest it in the tart tin, and then pre-bake it — you can also do this step a day or two ahead. 3) When ready to proceed, cook the cream filling and 4) pour it into the prepared pastry shell to finish baking and caramelising in the oven — this final step sacrifices nothing if done the day before.
I have taught this tart in pastry classes, I’ve sold them to fans at markets, and I’ve made them for friends and family over the years, and it is always a stunner. The reason I want to share it with you kind readers of this blog is not only because it’s so worth sharing if you don’t know it, but because there are two versions of the recipe published in the Chez Panisse collection of cookbooks. I thought it worth recording my observations on the differences, as people may wonder which recipe to follow or whether it matters.
I find it interesting to know that even the most celebrated and particular professional chefs sometimes make changes to their recipes, and that there is more than one way to get to same place. Following a recipe always requires us to make judgments about what ‘done’ means, or ‘ thick and silky’, or ‘golden brown’, or whatever it may be. A clear and well-tested recipe provides the essential roadmap, but the equipment we use varies and changes, as do ingredients and our own tastes, and we end up making recipes our own when we cook them. This celebrated tart from a celebrated kitchen is a good example of how even the most enduring recipes are always evolving.
It was first published in 1982 as ‘Lindsey’s Almond Tart’ in Alice Waters’s Chez Panisse Menu Cookbook; and then in 1985, with some alterations, in Shere’s Chez Panisse Desserts. Both recipes produce an excellent tart, as you would expect; but on the whole, the amendments in the latter are improvements for the home cook, not least because the instructions are more detailed. After making dozens of them, and teaching others to make it, I’ve settled on a combination of the two recipes, however, in my adaptation: Skip to recipe
The main differences I’ve found between the two Chez Panisse recipes is in the time required to cook the tart, and the nuances of balancing the pre-baking of the pastry shell with the time in the oven required to caramelise the filling. If you overdo the blind-baking of the empty shell, the crust can over-brown before the almonds have caramelised. Too little pre-baking of the shell and you can end up with undercooked pastry that would also spoil the tart.
For any seasoned or aspiring pastry geeks interested in a technical comparison of the two original recipes, and why I do what I do when making this tart, here’s the detail, below.
The original recipe calls for pre-baking the shell at the higher temperature of 400F (200C) for ‘ten minutes, until it begins to set and brown’. Shere’s amendment advises 375F (175C) ‘until fully baked’. I prefer the lower temperature for pre-baking the pastry, as the edges can over-brown before the bottom sets — so one point to Shere’s revised recipe. However, I also prefer to pre-bake the shell only until the bottom is set and the whole shell takes on a light golden colour — not until fully baked, as in my experience the pastry does continue to brown during the 30 minutes or so it’s in the oven with the filling, while Shere says it doesn’t. She is right that it’s not in long enough to cook much more, so the base must be completely cooked through before the filling goes in, but it’s a question of colour. I’ve found that it can get too dark if I take her literally. To me, ‘fully baked’ would be the darker brown I’m looking for by the end.
With regard to the filling: the original 1982 recipe cooks the sliced almonds with the cream from the start, for the full 15 minutes or so, which can make the nuts both softer and more prone to breaking. Shere’s later recipe sensibly adds the almonds at the end, and has them sit for 15 minutes to absorb the moisture and flavour of the cream while the filling cools enough to go into the empty shell: another point to the revised recipe.
The later recipe calls for less cream for the filling: three-quarters of a cup (180 ml) to the original one full cup (240ml); the sugar remains the same in both at three-quarters of a cup (150g). This fluid adjustment makes the filling reduce a little quicker on the stove-top before it goes into the pastry, and also means there is less chance the filling will overflow if individual cooks don’t reduce it enough. Recipes have to work for cooks who do things quite differently, and sometimes such considerations can make for a more reliable recipe for more people. I’ve tried both and personally prefer the caramel filling to be that slight bit creamier with the original amount, but also appreciate saving a bit of time (and calories), so I suggest a compromise between the two measures with the proviso that care is still needed to reduce it enough on the stove-top. If you do use a full cup (240ml) of cream as called for in the original recipe and don’t reduce it enough, you’ll end up spending extra time once the tart goes into the oven getting the filling to caramelise. There is more risk of the pastry over-browning in the process, or of the filling boiling over the edges and making the tart harder to remove from the tart tin.
The final baking temperature and timings are the last two differences between the two recipes. The original Chez Panisse Menu Cookbook recipe calls for the final bake with the filling to be done at 350F (180C) for 25-30 minutes, which I’ve found to be an underestimate of the time needed in my oven (I’ve had it take closer to 40-45 minutes at that temperature). Shere’s revised recipe calls for baking at 400F (200C) for 30-35 minutes, which I find more realistic, especially considering that one has to open the oven a few times to rotate the tart for even browning — but it is a little fierce for some ovens. After working with several people who have made this recipe in my cooking classes, I’ve suggested a minor compromise with 375F (190C), for 30-40 minutes.
It’s useful to know you can work at a higher temperature as it saves time, but there is also something to be said for baking at a lower temperature if you have a temperamental oven that doesn’t circulate evenly, which many don’t, or if you are a cook who sometimes gets distracted by multi-tasking (voice of experience speaking here). This tart does require watching and turning for the last 20 minutes or so, and it’s wise to watch it even more carefully if you use the higher temperature, as it can quickly over-brown in patches, producing a less uniform finish.
Adjust the temperature to where you feel most in control and simply allow more or less time as required. Watch carefully, and turn as needed, and you’ll know it’s done when it has a uniform golden brown finish that looks like something you’d like to eat. It’s a question of adapting to your own level of patience, your taste, and your own oven.
Saying all this, it’s a straightforward process whichever recipe you use, especially if you break it down into its component steps — and the results are so worth the effort.
RECIPE
Adapted from Alice Waters, Chez Panisse Menu Cookbook; and Lindsey Remolif Shere, Chez Panisse Desserts
Makes one 23-cm (9-inch) tart, serving 8
This recipe requires pre-baking (‘baking blind’ ) a short-crust pastry-shell, then filling it with a cooked filling of sweetened cream and sliced almonds. The liqueur flavourings do make a difference and elevate this tart to something very special. (Pastry recipe follows at the end of the tart recipe: for more tips on making short-crust pastry, see the posting “Trouble-shooting short-crust pastry”).
Ingredients:
- For the pastry: 1 recipe rested short-crust pastry sufficient for one 23-cm (9-in) tart shell (recipe below)
- For the filling:
- 100g (1 cup) blanched sliced almonds
- 180-200ml whipping cream (between ¾ cup and ¾ cup plus one to two tablespoons)
- 150g (¾ cup) caster sugar (fine granulated)
- a pinch of sea salt
- 1 tablespoon Grand Marnier (or substitute Cointreau)
- 1 tablespoon kirsch
- 2 drops almond extract
Directions:
- To prepare the tart shell: Roll the rested pastry between two sheets of cling film, or on a lightly floured pastry board, into a circle a little under 28cm (11 inches) in diameter (about 5cm or 2 inches larger in diameter than your pastry tin – check the pan against it to judge). Aim for a thickness of about 6mm (¼ inch) thick. Avoid making the centre thicker than the sides, and don’t use more flour than you must.
- Lightly butter the tart tin and wipe off the excess. Line the tin with the rolled pastry, and press it gently into the sides with your fingers, leaving the excess to hang over the edges for now. Trim off any unwieldy excess and save the scraps in case you need to do any repairs after pre-baking. ‘Dock’ the base of the pastry a few times with a fork to create steam holes and cover the lined tin lightly with cling film and refrigerate for 1 hour so the pastry can rest. This is important, as otherwise the pastry will shrink away from the sides of the tin and could collapse. You can do this step several hours ahead, or freeze the shell, ready-to-bake.
- Heat the oven to 190C/gas mark 5/375F when ready to pre-cook the pastry shell.
- Lightly butter a sheet of baking parchment large enough to fit inside the tart shell, scrunch it up, and then unfold it and place the buttered side against the pastry to act as a liner. Tuck it gently into the sides and edges, and fill with baking weights to keep the bottom of the pastry flat when baking. Buttering the paper will help it to come off cleanly without damaging the fragile pastry underneath.
- Bake for an initial 10-12 minutes or until set in the centre, and slightly golden on the edges, turning once in the oven for even cooking. Remove from the oven and carefully take out the parchment lining and the baking weights. If it looks set, proceed. If it’s still very undercooked, give it 5 minutes longer with the weights. Assuming it is set, protect your hands against the hot tart tin and carefully trim off the overhanging crust. Do this by running a sharp knife nearly flat along the edge, so the remaining crust is level with the top of the tart tin. Also take this opportunity to make any repairs as needed with the reserved raw dough. It’s important to plug any holes or reinforce any areas where the tin is showing through, to avoid leakage.
- Return the naked shell to the oven and bake for another 5 minutes or so, or until the pastry goes a shade darker all over. It should not be brown at this stage, but it should be set and have a slight golden colour, especially on the base. Remove the shell from the oven, still in its tin, and check again whether any repairs are needed; if so, make them while the shell is still warm as the raw dough will stick better. Put the tart on a rack to cool while you make the almond and cream filling — or pause here and store the completely cooled pastry shell in an airtight container for one or two days until ready to proceed.
- To cook the filling and finish baking the tart: Heat the oven to 190C/gas mark 5/375F.
- In a large heavy saucepan over low heat, use a spoon or silicon spatula to blend together the cream, sugar, salt, liqueurs, almond extract – everything but the almonds. Cook, stirring occasionally, until the sugar has dissolved completely and the mixture is silky smooth, about 10 minutes. Don’t let it boil until the sugar has completely dissolved. Once the sugar has dissolved, bring the cream to a boil, stirring constantly, and let it boil vigorously until the bubbles get thicker, about 5 minutes. The mixture will still be quite thin and not much darker in colour, but thick enough to coat the back of a spoon and leave a clean run where you swipe it with a finger (take care, as it’s hot). When the mixture reaches this stage, take the pan off the heat and gently mix in the almonds until they are all well covered. Set aside for about 15 minutes for the almonds to absorb the flavours, and for the mixture to cool slightly.
- Pour the almond and cream mixture into the cooled pastry shell, and distribute the almonds evenly. Line the oven floor with some foil in case of overflow, and place the tart on the centre of the rack for about 30 minutes or until it has browned to an even and pleasant caramel colour. Rotate it in the oven two or three times in the last 15 minutes to facilitate this, watching carefully. The filling will boil up and then settle again and begin to caramelise. It will continue to boil away for a minute or two once you remove it from the oven, so take this into account and don’t let it get too brown in the oven.
- Remove the finished tart to a rack and cool completely — or if you have had some spillage, remove it from the outer ring while just warm, before the caramel sets hard. To remove it from the tin, carefully use the tip of a sharp knife to prise it away in any places where the caramel has made contact with the tin. It’s sometimes helpful to place the tart on top of a tin of beans or similar, and push gently downwards to remove the ring. To remove it from the metal base, find a place along the bottom of the tart crust where you can get some purchase and carefully run a long spatula or knife underneath the entire tart to loosen it. Then set it level with your serving plate and slide the tart onto it without lifting any more than necessary.
- Bake the tart the day before serving and store airtight; or bake it ahead and freeze, wrapping well first. Defrost still in the wrappings so the condensation stays on the outside of the packaging.
Short-crust pastry recipe
Adapted from Alice Waters, Chez Panisse Menu Cookbook; and Lindsey Remolif Shere, Chez Panisse Desserts
Makes enough for one 23cm (9-inch) tart shell, serving 8
This recipe explains how to make short-crust pastry by hand. If you use a food processor to mix your pastry, do not go too fine—pulse just enough to keep some larger crumbs as described for mixing by hand, and add the water by hand to avoid over-mixing. Rolling the pastry between two layers of cling film makes it easier to get it thin enough, without having to add extra flour that would make it dry and tough. For more tips, see the posting, “Trouble-shooting short crust pastry”.
Ingredients:
- 165g (1¼ cups sifted) plain (all-purpose) flour
- 15g (1 tablespoon) caster sugar (granulated sugar)
- slightly rounded ¼ teaspoon cooking salt
- 140g (5 ounces or 1 stick plus 2 tablespoons) unsalted butter, cut into small cubes – cold, but not rock hard
- 4 to 5 drops each of almond and vanilla extract
- 1 tablespoon iced or cold water
Directions:
- In a medium bowl, lightly mix the flour, sugar and salt.
- Add the cubes of butter, and using both hands, incorporate them into the flour by flattening the butter cubes between your fingertips and thumbs. Don’t rub back and forth: try to flatten the two together in one direction. Use as light a touch as you can, as over-handling will make the dough tough and oily. You should end up with a rough, sandlike texture with some larger pea-sized pieces or flakes of flour-coated butter. It’s not necessary to achieve a wholly uniform crumb, as a few larger pieces of butter help create flakiness.
- Drop the vanilla and almond extracts into the water, and drizzle the liquid evenly over the flour/butter mixture. Using a fork or two blunt knives, lightly stir the dough until the crumbs just stick together when pinched. If you feel you need a little more water, add it very gradually, just a few drops at a time. The dough should not be wet, as this could make it heavy; but neither should it crumble.
- Before you gather it into a ball, give the dough one or two gentle ‘kneads’ on a work surface: gently flatten the loose dough in one direction using the heel of your hand. This will help lengthen the pockets of butter to create flakiness. Do this flattening action just once or twice, however, as over-kneading will develop the gluten in the flour and make the dough tough and liable to shrinkage.
- Now, still working with a light hand, gather the dough into a shallow disk ready for rolling, and wrap in cling film. Refrigerate for at least an hour. You can make it the day ahead, or freeze it and thaw while still wrapped. Let it soften slightly before rolling if you chill it longer than one hour.
- Lindsey Remolif Shere, Chez Panisse Desserts. Random House
- Alice Waters, The Chez Panisse Menu Cookbook. Random House
Other pastry recipes on Crumbs on the Table:



 Tour D’Argent: a remembrance of things past at today’s prices
 Apricots, les abricots
 I used to cook in a piggery


 Seed cake and story




 Easter is late this year
Leave a Reply